You KNOW you HAVE TO get started with Google Ads scripts to take your skills and Adwords performance to the next level.
You just…haven’t…started…yet.
You’re probably feeling like your manager who is looking at your excel sheets. Where do you even begin?!?
And then there is the Google Ads Scripts interface. A bit Intimidating maybe? Confusing, for sure!

Fear no more.
Here’s a short demo on how to actually install and have a script running in Adwords, within 5 minutes!
Just take these steps below to set them up in the new interface. The good news:
you don’t need to know any javascript to get started using Adwords Scripts.
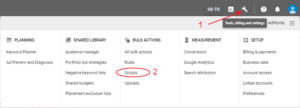
Step 1 and 2 : Find out where to put the script
Easy. In the upper right corner, you will find the wrench icon that will take you to Tools, Billing and Setting. Click it.
Next, under Bulk Actions click on ‘Scripts’.
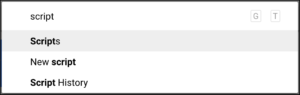
PRO TIP:
In the new interface you can make use of keyboard shortcuts. If you type gt anywhere in the interface a search box will appear that allows you to navigate the interface quickly. Search for ‘scripts’ and hit enter.
If you are still using the old interface you can find Scripts on the left, in the navigation menu, under Bulk Operations.
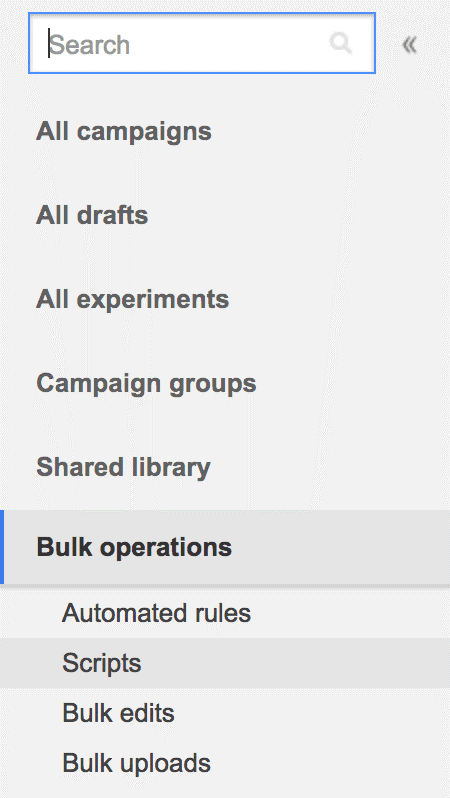
Since the old interface will not be around for much longer, the rest of this post will focus on the new Adwords interface.
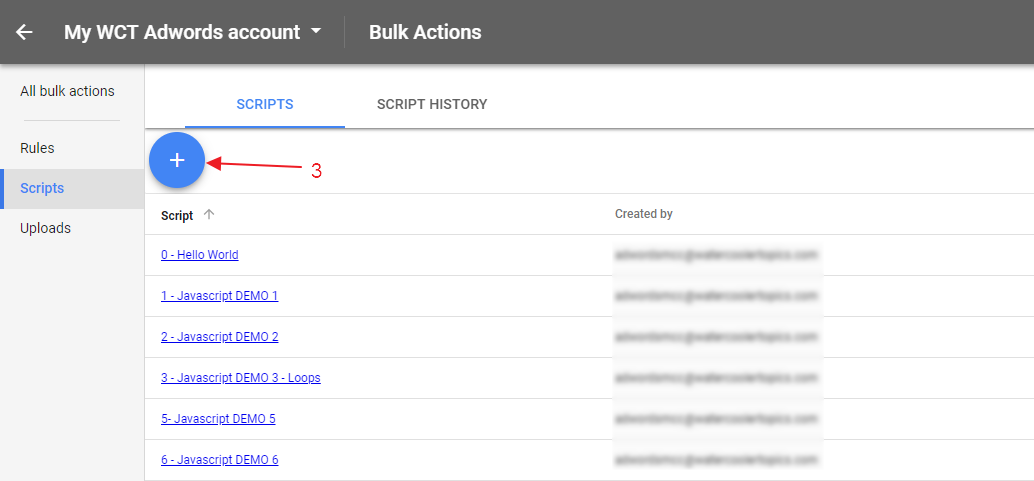
Step 3: Add a new script
After navigating your way to the Scripts section in Adwords you will see a list of the scripts that are currently installed. The list will be empty if you do not have any scripts installed. Duhhh.
Now click that big blue dot containing the plus sign to add a new script. This will open up the Adwords Scripts editor.
Step 4: Copy-Paste, or type the code
Now you are inside the Adwords Scripts editor, or some fancy developers might call the Adwords Scripts IDE. IDE is an acronym for ‘Interactive Development Environment’, but you can just forget about that for now. The important thing is: this is where the magic happens! This is where you add and edit your javascript code.
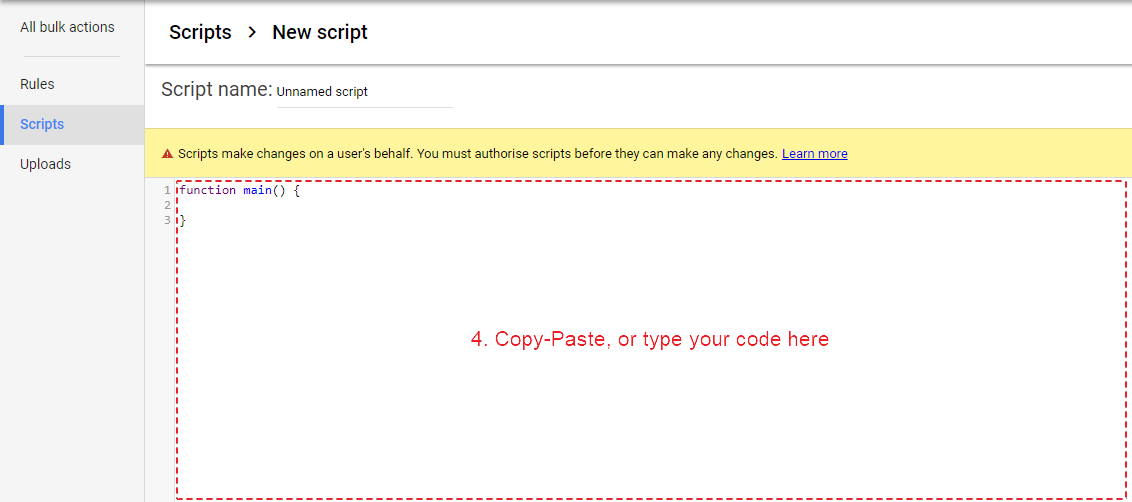
For now, just copy-paste the example code below, or copy some code of your own.
Google automatically ads a little piece of code when you create a new script:
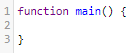
Be sure to completely replace this piece of code with the code you are copy-pasting.
NOTE: if you copy-paste some of the other adwords scripts that are out there, you might need to change some configuration settings in the script. Follow the instructions for the script and you should be fine. Instructions can often be found in the comments within the script (comments are colored orange in the Adwords Script editor), or documentation on the webpage that publishes the script.
// This script will ouput all search terms that had over 100 clicks last 30 days, and zero conversions.
// During the course you will learn how to automatically send this report to your email every day, week or month

function main() {

  var report = AdWordsApp.report(
  "SELECT Query,Clicks,Cost " +
  "FROM SEARCH_QUERY_PERFORMANCE_REPORT " +
  "WHERE " +
  "Clicks >= 100 " +
  "AND Conversions < 1 " +
  "DURING LAST_30_DAYS");

  var rows = report.rows();

  while(rows.hasNext()){
    var row = rows.next();
    Logger.log(row['Query']+";"+row['Clicks']+";"+row['Cost']);
  }

}
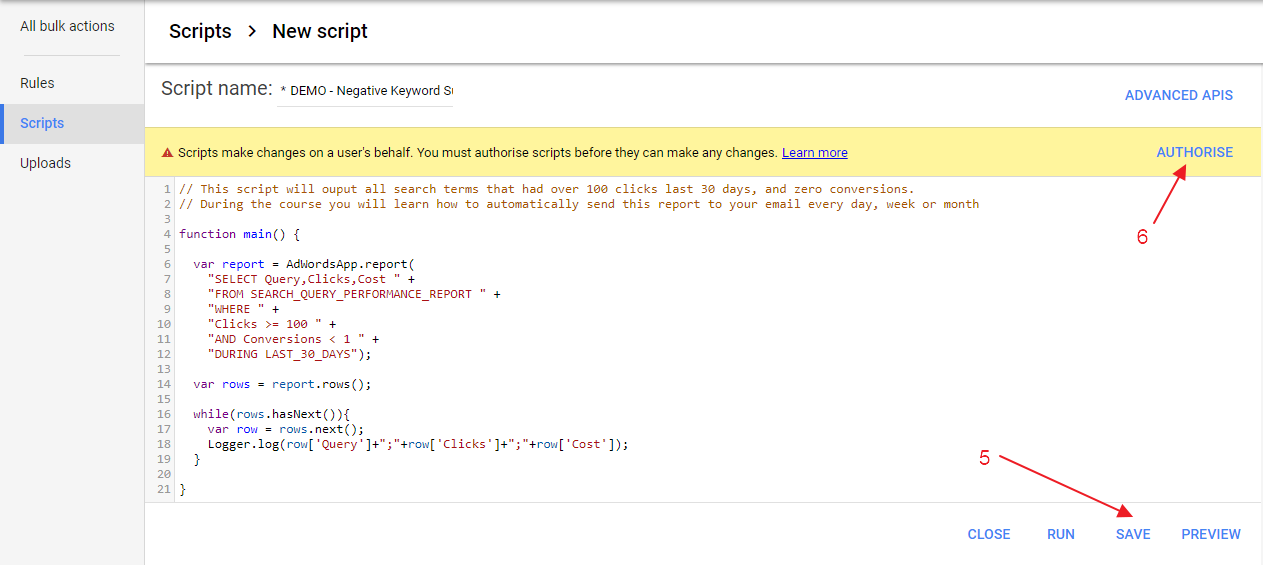
Step 5, 6: Name, Save and Authorise
Now give your script a name (above the script, on top of the screen). You might see an (*) asterik in front of the script name, this indicates you have some unsaved changes.
Save the script, and click Authorise to give the script permission to run.
Scripts are independent entities within Adwords that take actions on the user’s behalf. For that reason, Google asks you to explicitly grant scripts permission to execute.
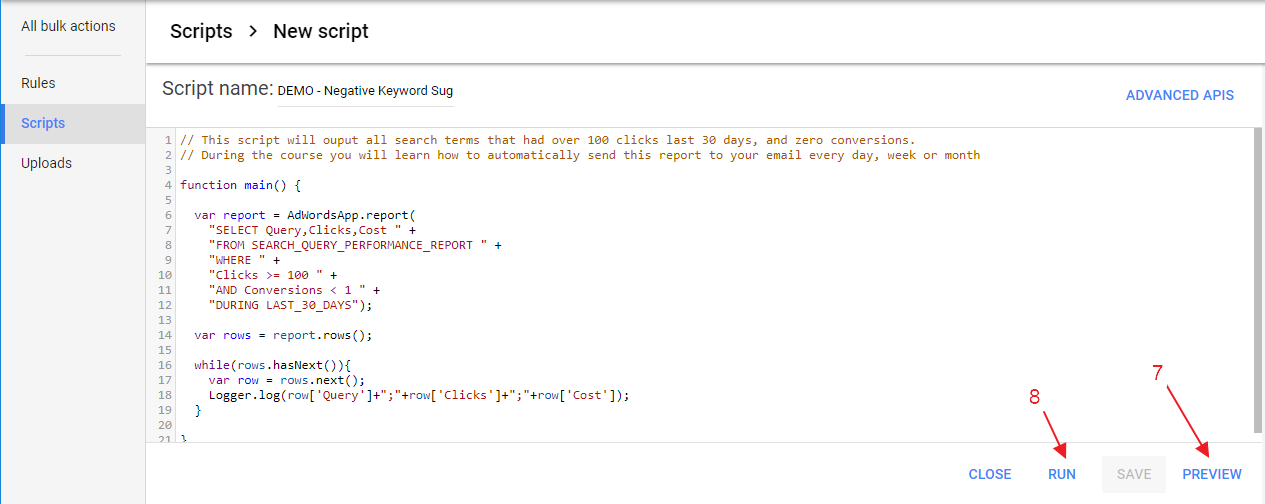
Step 7,8: Preview and Run
Now that your script is saved and has all the permissions to make changes on your behalf, you want to make sure it only makes changes you want it to do. This is where the Preview option comes in. Preview allows you to see what would happen if you decide to really run the script. In Preview mode no real changes are made to your account, so no need to be afraid. Note however, if the script makes changes to anything outside of Adwords (like for example adding data to a spreadsheet), the Preview mode will make this happen.
Go ahead, hit Preview and see what the script does.
Step 9, 10: Check the Changes and Logs to see what happens
This is where you can see what changes the script would make (if your Preview it) or has made (if you actually run it).
Since our script does not make any changes to Adwords entities but only logs information, let’s have a look at the Logs section in the editor. This is where the script logs information like error messages and its output.
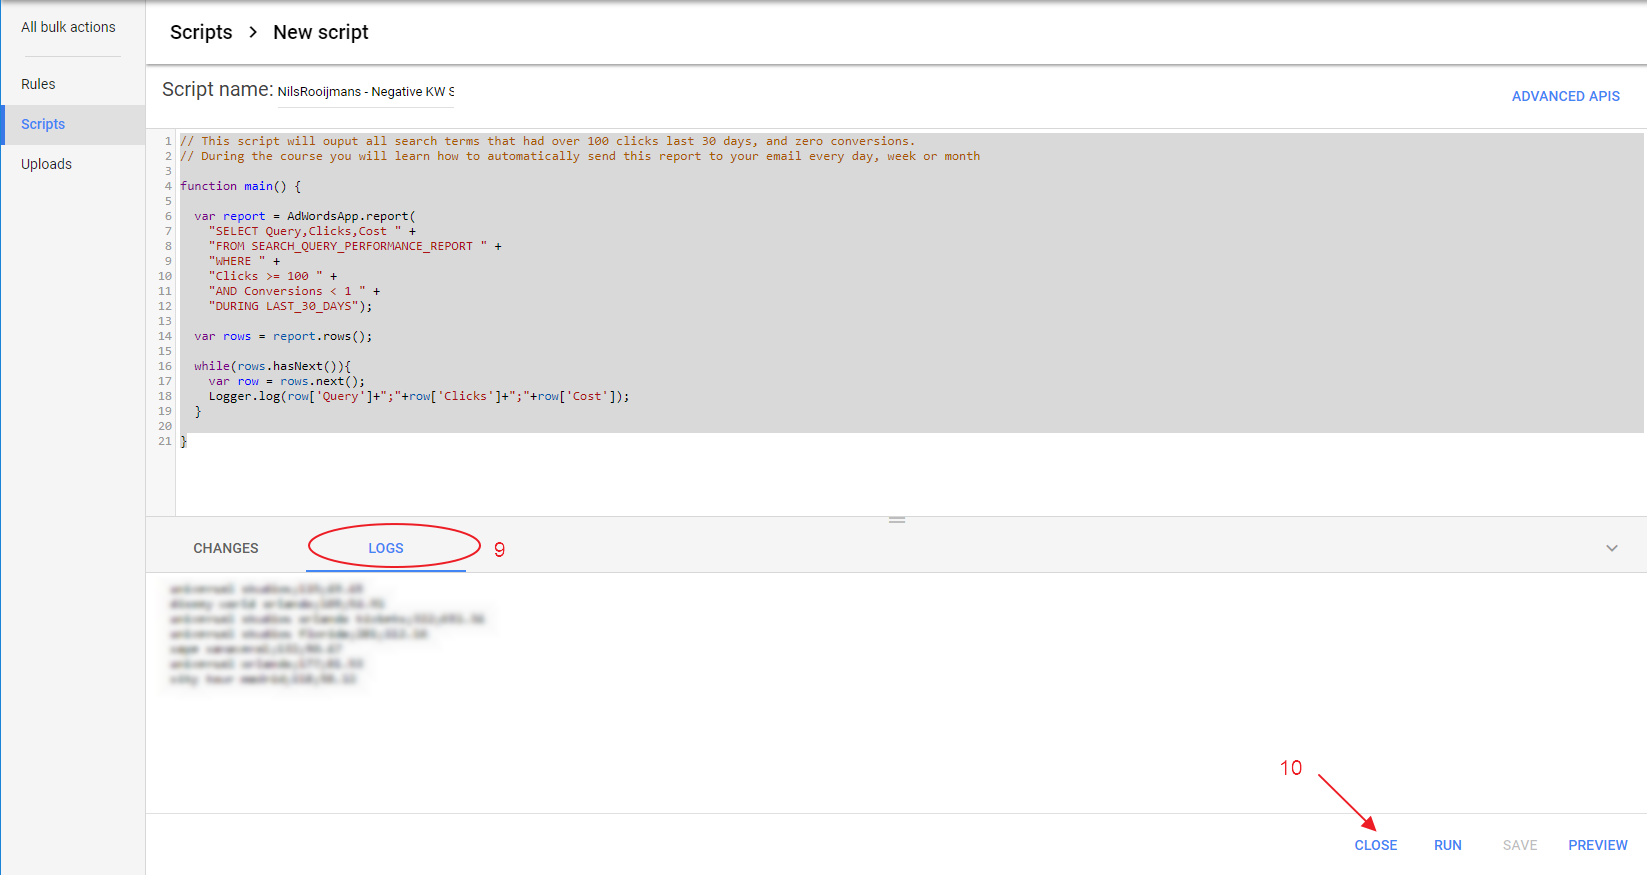
Now close the logs and head back to the Scripts overview page.
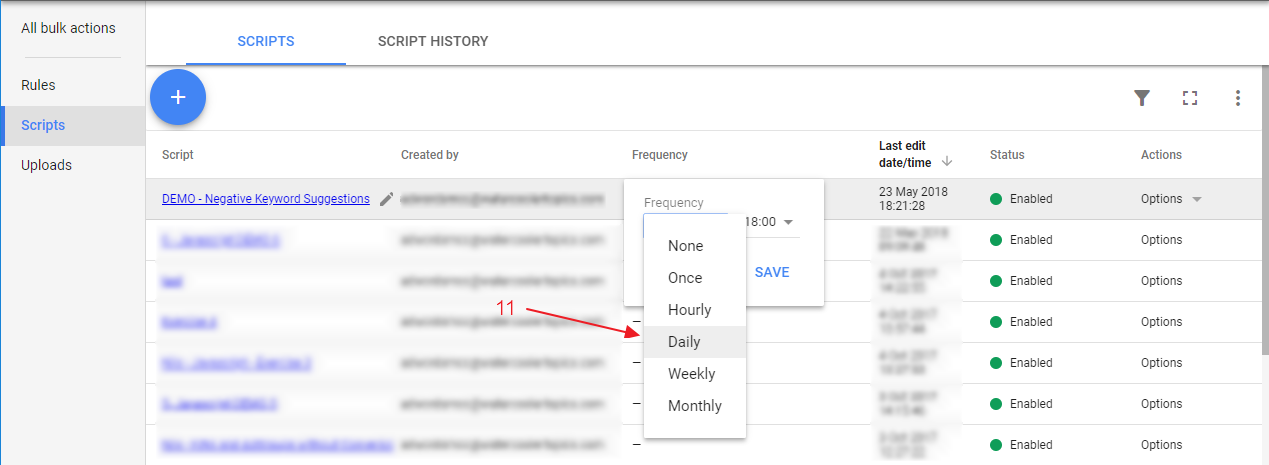
Step 11: Schedule the script
Most scripts are intended to run multiple times, like daily, once a week, or once a month. This is where you schedule its frequency.
Also note the options on the far right. Here you can run, edit, duplicate or disable a script.
Additional info for the pro’s
On the top of the screen you will also see ‘Script History’. Clicking this link will allow you to see the date and time a script ran, its status and the result.

If you click on the link in the Results column you will be taken to a detail page of all the changes made by the script.

Congrats! You’ve installed and run your first Adwords Script!
You see? You CAN run scripts by yourself. Not that scary anymore.
Now go ahead, copy-paste and run this very useful Adwords Script.
Another WIN.
Ready to run some more scripts? Subscribe to my mailing list to receive updates on how to start learning to write your own Google Ads Scripts.